Vagrant and Ansible for Local Development
If you’re using Ansible to provision/manage your infrastructure it only makes sense to utilize the same setup locally instead of having to go through all of the same configuration again. It eliminates a bunch of the “works on my machine” issues, it documents the entire process, makes it easier for new developers to get up to speed, etc.
I’m going to setup the open-source Ruby on Rails application Lobste.rs as my application.

For the setup that I’ve been utilizing, everything but the physical files will be in Vagrant. Well, they’re in there but just as a mount within the virtual machine. I find that this makes it an easier transition for utilizing your existing favorite editor. It’s also very helpful if you’re developing multiple applications and you’ve already configured them locally and aren’t ready to work on them via Vagrant. It’s more of an opt-in approach to developing applications when you’ve already setup applications locally which is preferred instead of switching everything over to Vagrant immediately.
First we’ll clone the Lobste.rs repository to our machine:
git clone git@github.com:jcs/lobsters.git
Install Homebrew, Ansible(via homebrew works well) and Download Vagrant via their recommended instructions.
Now we need to install Virtualbox, I prefer to use brew cask for this:
brew install caskroom/cask/brew-cask
brew cask install virtualbox
Now we can start working on the Ansible playbook for provisioning the host machine. It’s just going to be a simple setup that involves resolving *.dev to localhost with dnsmasq. If you already have *.dev resolving to your local machine you could always skip this portion, it’s the steps from this blog post wrapped up into a simple playbook.
Create a new directory for Ansible alongside the Lobste.rs directory:
mkdir ansible && cd ansible
Create the osx.yml playbook in the ansible directory with the following contents:
---
- hosts: all
  tasks:
    - name: Install homebrew dependencies
      homebrew: name=dnsmasq

    - name: Add *.dev resolver
      lineinfile:
        state: present
        line: nameserver 127.0.0.1
        create: yes
        dest: /etc/resolver/dev
        owner: root
        group: wheel

    - name: Resolve *.dev to localhost
      lineinfile:
        state: present
        line: address=/.dev/127.0.0.1
        create: yes
        dest: /usr/local/etc/dnsmasq.conf
We’ll run this playbook prior to running our regular provisioner. It’s a simple playbook that utilizes dnsmasq to map *.dev to localhost so that you can have zomgansibleisawesome.anything.dev as a resolvable domain.
Since we’ll be running this playbook against our host machine, we need to create a simple inventory file for it. Create the inventory file with:
[localhost]
localhost           ansible_connection=local
We just need to run this osx.yml playbook once before we provision our Vagrant machine so that it sets up our local resolver. Go ahead and run the playbook with:
ansible-playbook -i inventory -s -K osx.yml
Next we’ll create the Vagrantfile, this file tells Virtualbox how to provision the virtual machine. Create a Vagrantfile with the following contents:
# -*- mode: ruby -*-
# vi: set ft=ruby :

# Vagrantfile API/syntax version. Don't touch unless you know what you're doing!
VAGRANTFILE_API_VERSION = "2"

Vagrant.configure(VAGRANTFILE_API_VERSION) do |config|
  config.vm.box = "ubuntu/trusty64"

  config.vm.network "private_network", ip: "192.168.50.4"

  config.vm.define "rails" do |rails|
    rails.vm.synced_folder "~/src", "/home/vagrant/src"

    rails.vm.provision "ansible" do |ansible|
      ansible.playbook = "rails.yml"
      ansible.host_key_checking = false
      ansible.extra_vars = { ansible_ssh_user: 'vagrant' }
      ansible.sudo = true
    end
  end
end
The Vagrantfile assumes that Lobsters sits in ~/src/lobsters, modify as needed. With Vagrant you can have multiple machines defined in one Vagrantfile, here we’re creating the “rails” machine. Later on you could add a “db” machine and a “search” machine to simulate a full stack locally.
Now we can get started on building our rails.yml playbook that our Vagrantfile will be using. We’re going to utilize the abtris.nginx-passenger and zzet.rbenv roles to get us going:
ansible-galaxy install abtris.nginx-passenger zzet.rbenv -p roles/
Open up rails.yml and now we can get started on getting our rails stack configured. I’ve added the base set of variables needed for zzet.rbenv as in playbook variables as well.
---
- hosts: all
  vars:
    rbenv:
      env: user
      version: v0.4.0
      ruby_version: 1.9.3-p429
    rbenv_users: ['vagrant']
  roles:
    - abtris.nginx-passenger
    - zzet.rbenv
    - nginx
THE NGINX ROLE
Now we’ll setup our virtualhost with nginx and configure passenger, first we’ll make the main task of our nginx role.
roles/nginx/tasks/main.yml:
---

- name: Read passenger configuration
  register: passenger_root
  command: passenger-config --root
  changed_when: false

- name: Add passenger configuration
  template:
    src: passenger.conf.j2
    dest: /etc/nginx/conf.d/passenger.conf
  notify: nginx reload

- name: Add virtualhost configuration
  template:
    src: virtualhost.conf.j2
    dest: /etc/nginx/sites-available/{{ item.server_name }}
  with_items: virtual_hosts
  notify: nginx reload

- name: Disable virtualhosts
  file:
    path: /etc/nginx/sites-enabled/{{ item.server_name }}
    state: absent
  when: item.disabled is defined
  with_items: virtual_hosts
  notify: nginx reload

- name: Enable virtualhosts
  file:
    src: /etc/nginx/sites-available/{{ item.server_name }}
    dest: /etc/nginx/sites-enabled/{{ item.server_name }}
    state: link
  when: item.disabled is not defined
  with_items: virtual_hosts
  notify: nginx reload
Add the mentioned templates:
roles/nginx/templates/virtualhost.conf.j2:
# {{ ansible_managed }}
server {
  listen 80;
  rails_env {{ item.rails_env }};
  passenger_enabled on;
  server_name {{ item.server_name }};
  root {{ item.root }}/public;
}
roles/nginx/templates/passenger.conf.j2:
# {{ ansible_managed }}
passenger_root {{ passenger_root.stdout }};
passenger_ruby /home/vagrant/.rbenv/shims/ruby;
We also need to define the virtual hosts for Nginx which we utilize to create the associated sites-* files in the main nginx task.
---
- hosts: all
  vars:
    rbenv:
      env: user
      version: v0.4.0
      ruby_version: 1.9.3-p429
    rbenv_users: ['vagrant']
    virtual_hosts:
      - server_name: lobsters.dev
        root: /home/vagrant/src/lobsters
        rails_env: development
  roles:
    - abtris.nginx-passenger
    - zzet.rbenv
    - nginx
Now that we have all of that configured, go ahead and run vagrant up which will add our new virtual host files and configure passenger to run with nginx. We’re almost finished, we still need to bootstrap the rails application within Vagrant.
SETTING UP OUR RAILS APPLICATION
To simplify setup edit the Gemfile in the Lobste.rs application and add dotenv-rails and remove sqlite3. Edit your .env file and add the following to it:
DATABASE_URL=mysql2://localhost/lobsters_development
SECRET_KEY_BASE=randomsecretsauce
I’m going to write a simple bin/setup script that will setup the lobsters application on the virtual machine. On the host machine create bin/setup with the following contents and make it executable:
bin/bundle
bin/rake db:setup
Edit your Vagrantfile and add an additional provisioner within your rails vm but after the ansible provisioner:
rails.vm.provision "shell", inline: "cd ~/src/lobsters && bin/setup",
  privileged: false
We also need need to have bundler installed on the machine so that the bundle command will work properly to get the lobsters application setup. Edit your rails.yml file and add a task to install Bundler:
---
- hosts: all
  vars:
    rbenv:
      env: user
      version: v0.4.0
      ruby_version: 1.9.3-p429
    rbenv_users: ['vagrant']
    virtual_hosts:
      - server_name: lobsters.dev
        root: /home/vagrant/src/lobsters
        rails_env: development
  roles:
    - abtris.nginx-passenger
    - zzet.rbenv
    - nginx
  tasks:
    - name: Install gem dependencies
      apt: name={{ item }} state=present
      with_items:
        - mysql-server
        - libmysqlclient-dev
        - nodejs

    - name: Install bundler
      sudo_user: vagrant
      command: bash -lc "gem install bundler"
Now we can go ahead and reprovision our machine with:
vagrant provision
Once that’s complete we can map a hostname in /etc/hosts to the Vagrant virtual machine’s IP address:
192.168.50.4 lobsters.dev
Adding the entry to /etc/hosts allows you to opt-in to which applications you’d like to hit your virtual machine and which you’ll continue to develop in OSX.
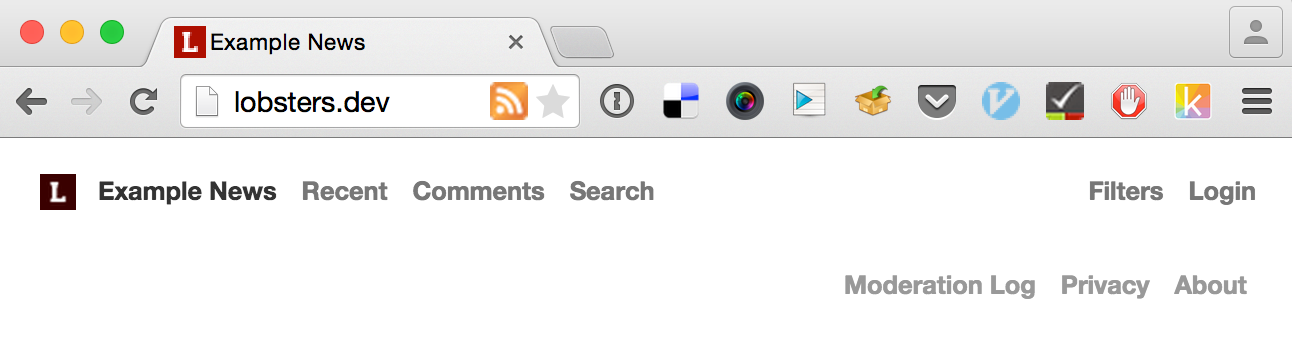
Now you should be able to visit http://lobsters.dev on your local machine and see your application running.