You should check out Render for hosting your Rails app
For hosting my own projects and smaller apps I typically utilize Heroku, it’s pretty simple to get up and running and it just works. I’ve been hearing about Render recently and decided to give them a try for a new app that I needed hosting for.
Render provides a simple way to host various containers and service types, you can host a simple static website all the way up to a full stack web application with most of the bells and whistles. With Render you can configure your hosting via their web dashboard or via a simple blueprint spec file which is in their configuration language. Yes, another configuration language but I’d argue that it’s much simpler than some of the other orchestration files you can get yourself tangled in.
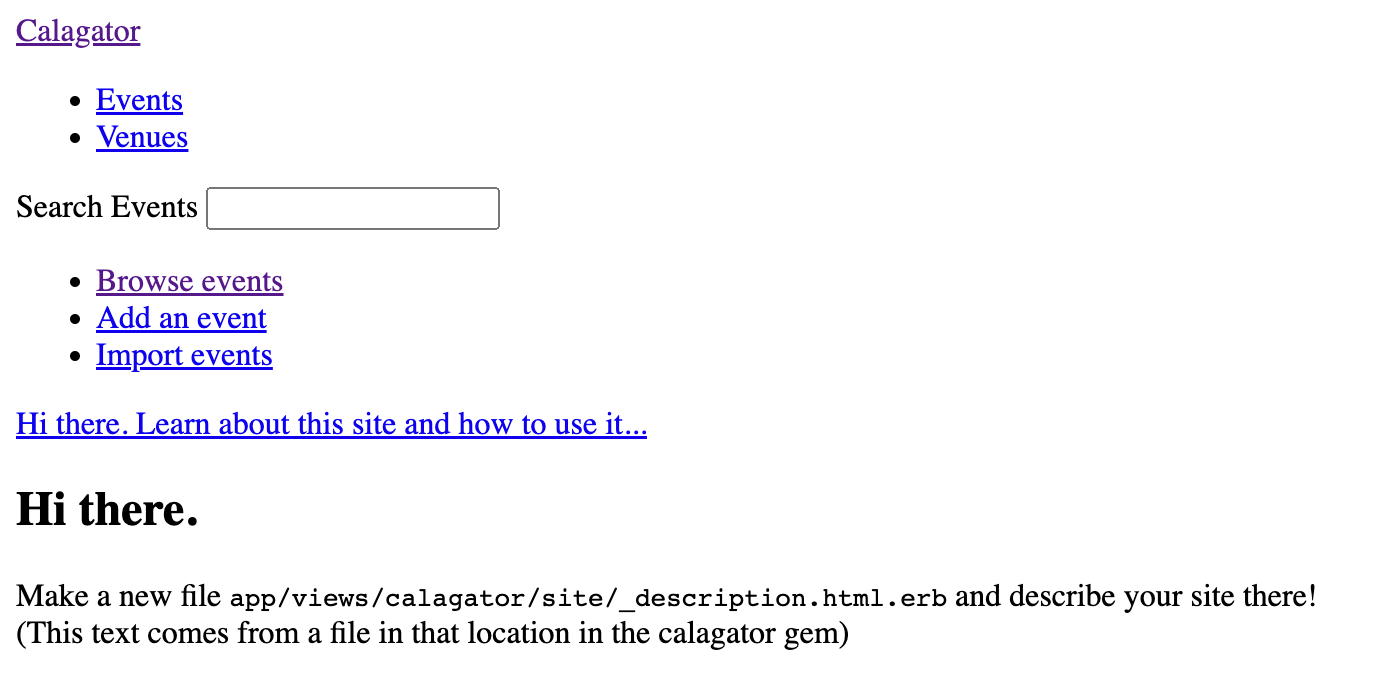
I have a few uses for a calendar app that’s not just Google Calendar so I figured it’d be nice to install Calagator for this post. This setup can be for whatever Rails app you’d like, I’m just utilizing an open source Rails app to simplify things and use a functioning app instead of just a useless hello world app. If you’d like to skip ahead to just the Render hosting portion of this feel free.
Here we go.
Calagator is shipped as a rails engine so it comes as a simple gem install so we’ll get that going locally first.
The gem uses a few older gems as dependencies which means we need to utilize an older version of Ruby, I went with ruby-2.5.9 to get this installed properly. Set your ruby version appropriately, for my setup I just add a .ruby-version file with ruby-2.5.9 in it and issue a gem install calagator -v 2.0.0.pre.1 --pre.
Once that’s installed go ahead and create a new Rails app with the calagator generator, you could also mount this inside an existing app. All additional flags to the calagator command will be passed down to the rails new generator and since we’ll eventually be using postgres I’ve specified that with the generator.
calagator new events -d postgresql
When you run this command it’s going to complain about the Rails version and not install your gems. We can go ahead and swap out the Rails version to ~> 4.2 in the Gemfile and then run bin/setup to finish up the rest of the app setup.
If you’re on macOS, go ahead and add the x86 platform to your Gemfile.lock since we’ll need this for Render and most other hosting platforms.
bundle lock --add-platform x86_64-linux
One last Gemfile change that I needed to get things running was to require the paper trail manager since it looks like there’s an issue requiring it within the gem’s gemspec file. Also, update the requirement for Calagator to point to github master as there are a few issues that need to be fixed on the released versions, looks like there’s a pre-release in the works.
gem 'paper_trail_manager', git: 'https://github.com/fusion94/paper_trail_manager.git', ref: 'efe12bb8a706eb30a02c64c6163684b247b82499'
gem 'calagator', github: 'calagator/calagator'
Render
Render isn’t as automagical as Heroku but it’s really easy to get something up and running with a few simple scripts. Render allows you to specify a build command and a start/run command for each service that you’d like to run. For the start command we’re just going to use a simple rails server but for the build command we need to do the usual precompile and migrate.
Place this in bin/render-build and run chmod +x bin/render-build on it.
#!/usr/bin/env bash
# exit on error
set -o errexit

bundle install
bundle exec rake assets:precompile
bundle exec rake assets:clean
bundle exec rake db:migrate
The build flow should look pretty standard but feel free to customize as needed. Next we just need to add a render.yaml file which is the blueprint spec file I mentioned before. There’s quite a bit you can do with this file and we’re just spinning up a simple web service and then a postgres database for it. I’ve added a few comments inline to explain a few items with the blueprint file.
databases:
  - name: events # Creates a database named 'events'
    ipAllowList: [] # Only allow internal connections

services:
  - type: web
    name: events
    env: ruby # The version is automatically picked up from a .ruby-version file
    buildCommand: "./bin/render-build" # The script we just created above will run this to build our service
    startCommand: "./bin/rails server" # This gets called after build
    envVars:
      - key: DATABASE_URL
        fromDatabase:
          name: events
          property: connectionString # This is a pretty nifty feature of Render that utilizes the connection string from the database we specified at the beginning of this file.
Commit this new render.yaml file to your repository and push it up to your GitHub or GitLab repository. Once that’s up then head on over to https://dashboard.render.com/blueprints to import the repository which will also detect the blueprint file. Go ahead and name the service group and then you’ll notice how it mentions it’s going to create a database and web service which is what we’ve defined in our render.yaml file.
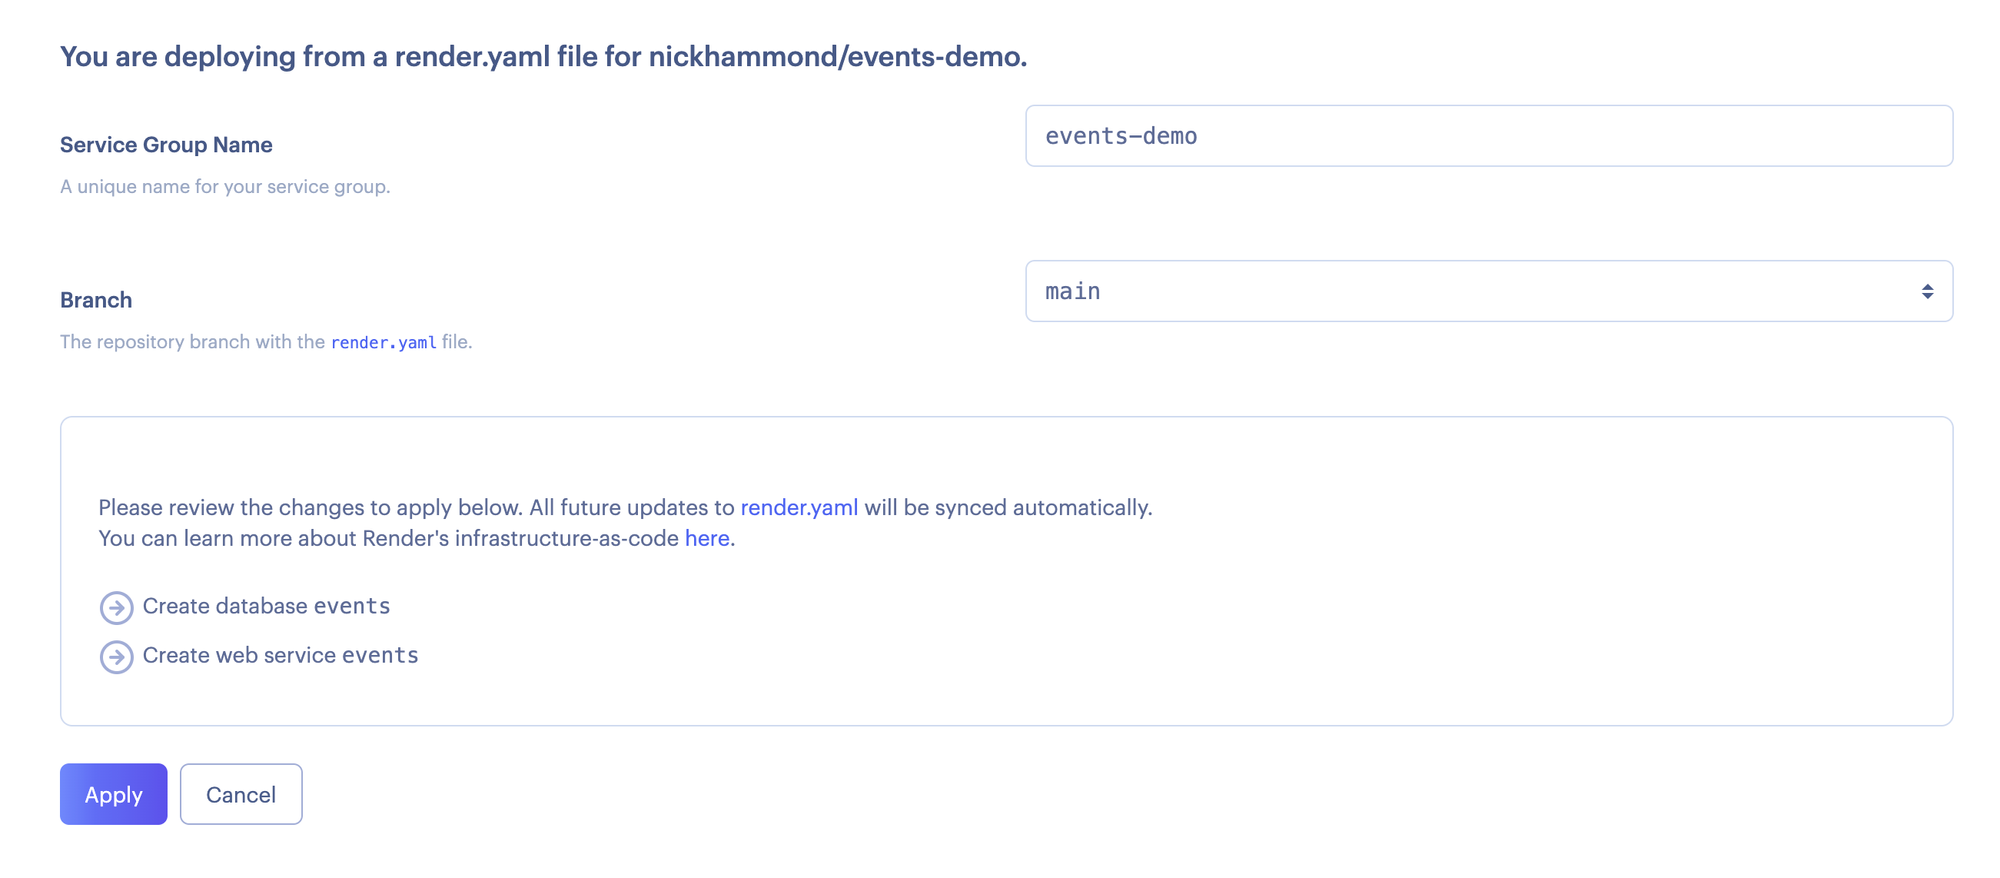
Once you click “Apply” then it’ll start creating those services for you. After every push to GitHub, Render will then check to see if there are any changes that need to be applied if the render.yaml file has changed. It’s a really simple way to have infrastructure as code as well as the automatic provisioning of your resources and in a pretty simple form.
Render also automatically rebuilds and starts our web service with each deploy which utilizes rolling deploys. You can easily add a health check with render for web services by adding something like healthCheckPath: /health to your web service and then defining a simple route in your app.
Take a look through the full Render blueprint spec to see all of the other options and services you can easily spin up with Render, it’s a refreshing take on hosting.
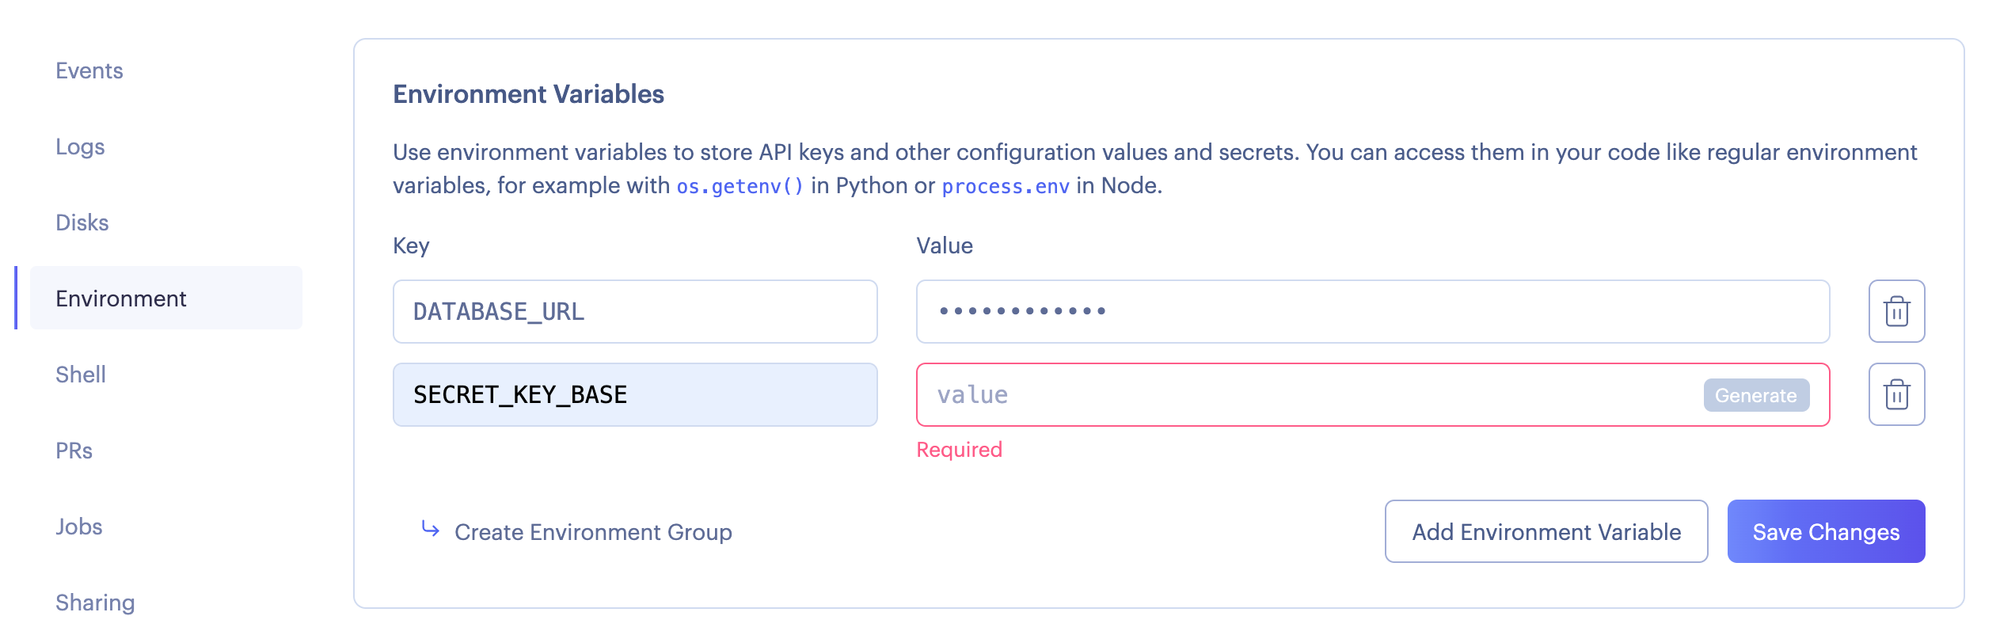
You’ll notice that the deploy fails because of:
ArgumentError: Missing `secret_key_base` for 'production' environment, set this string with `rails credentials:edit`
Normally I’d setup Rails credentials and add the key that way, for simplicity and to highlight how to add environment variables to Render we’ll go ahead and add them that way. Open up your web service and click “Environment” in the sidebar navigation. From here just add a new environment variable with a key of SECRET_KEY_BASE and then click “Generate” which will generate a key for you. You could of course generate one locally with rails secret and utilize that but this should do for now.
Another thing to note in this section is the ability to create an environment variable group, this is a great addition to share environment variables between specific services. So far I’ve only used them to set RAILS_ENV and RACK_ENV to production for the production environment. Sharing environment variables across service should be utilized with caution just to ensure the service has the least amount of knowledge needed to properly run.
Once you save the new environment variable Render will automatically trigger a new deploy of your service since it detected a change. Once that completes you should be able to render your new Rails app at the generated host in Render. There it is! Needs a little work but everything is up and running.