
So you want to Terraform that thing?
Terraform is a great utility to manage your infrastructure and it’s often used to provision new infrastructure but it’s also pretty simple to start using it with existing infrastructure. Terraform just deals with managing the base infrastructure and then you layer on some provisioning steps with something like Ansible or Puppet.
You can utilize existing infrastructure within Terraform in a couple of different ways. If you just want to reference the existing infrastructure so that you can connect it to other resources that you’re managing you can utilize a Terraform data source. If you want to modify and fully manage existing infrastructure then you can utilize a Terraform resource. Whichever way you go about it though it’s best to go one step at a time instead of trying to integrate everything in one go.
For example, say we have an existing Digital Ocean droplet that we want to connect to an A record within Cloudflare. We’re already using Cloudflare to manage a bunch of our DNS records and we just need to point terraform.nickhammond.com to our existing Digital Ocean droplet.
Note: This post is utilizing v0.12+ Terraform syntax which most notably allows you to avoid string interpolation if you don’t actually need it.
mkdir terraform-demo && cd terraform-demo
Go ahead and grab an API key from Digital Ocean so that you can add a provider for Digital Ocean to query for your droplet information. In Terraform a provider is utilized to query an API, manage resources, and reference data. Start creating your plan by adding the provider block to main.tf.
provider digitalocean {
  token = "secret"
}
With the provider block in place, we can go ahead and initialize Terraform. Our plan is pretty simple at this point so when we initialize Terraform for now it’s just going to download the Digital Ocean plugin for us within a new .terraform directory. The plugin is specific to the platform that you initialized Terraform on and installs a specific version, Terraform also creates a lock file to help with managing plugin versions.
$ terraform init
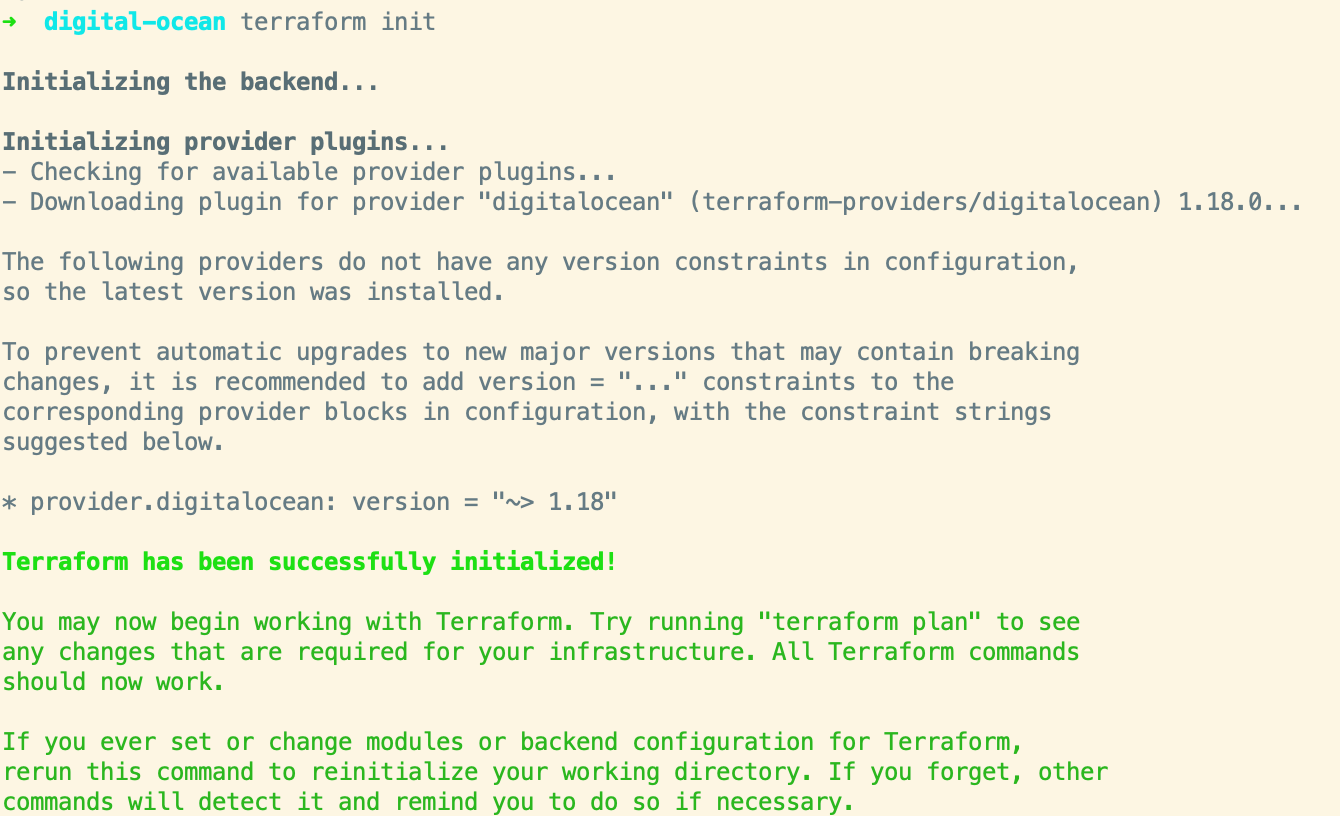
The plugin executable for your platform, built via go is now at .terraform/plugins/darwin_amd64/terraform-provider-digitalocean_v1.18.0_x4.
Terraform creates a plugin lock file, similar to a Gemfile.lock or yarn.lock file. $ cat .terraform/plugins/darwin_amd64/lock.json { "digitalocean": "7969eff5da69583e5f37d8d6982973aa452966d24de5b6f9c0d33b806c87f518" }
It’s also good practice to specify a specific version for a plugin as Terraform mentions in the init output, go ahead and add that version to the provider.
provider digitalocean {
  token   = "secret"
  version = "~> 1.18"
}
With the Digital Ocean provider added we can go ahead and find our existing Digital Ocean droplet by name, ID, or tag. Add a data source for the existing Digital Ocean droplet and reference it by name, I have a droplet named “terraform-demo” that I’ll be using. I’m also going to output a few attributes about the droplet for informational purposes.
data digitalocean_droplet terraform_demo {
  name = "terraform-demo"
}

output droplet_region {
  value = data.digitalocean_droplet.terraform_demo.region
}

output droplet_id {
  value = data.digitalocean_droplet.terraform_demo.id
}

output droplet_ip {
  value = data.digitalocean_droplet.terraform_demo.ipv4_address
}
Outputs in Terraform are useful for an end of plan report about the resources within your plan, not required but helpful.
Normally you run terraform plan next to see what changes Terraform is going to make since we’re just referencing data there’s not much for it to do but it will confirm that we’ve connected to Digital Ocean and if it found the droplet or not.

Even though we don’t have anything for Terraform to actually apply, go ahead and run terraform apply so that you can see the outputs.
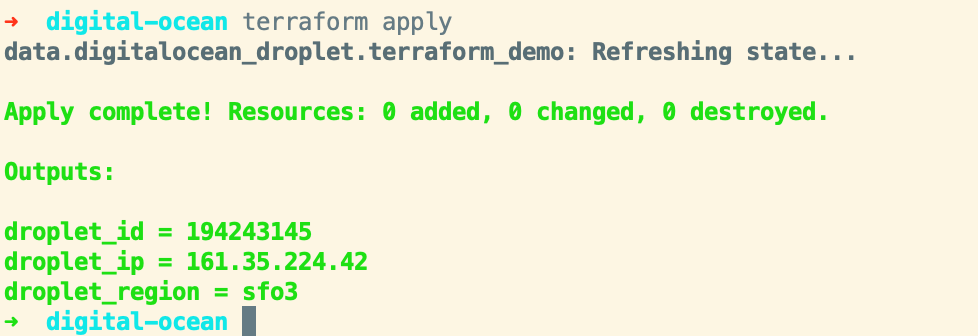
Nifty! This is a really simple example but Terraform has a bunch of providers which provides a more high-level interface to managing resources within those APIs.
If you run terraform apply again with TF_LOG=trace you’ll see that Terraform is utilizing the list all droplets endpoint and then filtering those down by name. The Digital Ocean API allows you to find a droplet via ID or tag but not name but we didn’t even really need to know that since the Digital Ocean provider abstracts that all away for us. Terraform has support for all of the major cloud providers as well as various other products and APIs like Gmail and Jira.
Now that we know the IP address of our droplet via Terraform we can go ahead and configure the Cloudflare provider and create an A record to point to our droplet.
provider cloudflare {
  email   = "email@example.com"
  api_key = "secret"
  version = "~> 2.0"
}
Since we’re adding a new provider Terraform needs to be initialized again so that it downloads the Cloudflare plugin, go ahead and run terraform init to do that.
To create the new A record in Cloudflare we need to utilize a couple of things. Since the zone(nickhammond.com) already exists in Cloudflare we just want to be able to reference data from it and not manage it. Go ahead and create a new data source with a filter specific enough to grab the zone.
data cloudflare_zones nickhammond {
  filter {
    name = "nickhammond.com"
  }
}
It’s important to note the difference between a data source and a resource. A data source just gives the plan read access to something. A resource allows the plan to CRUD that resource as needed.
Now that we’ve looked up the zone we can utilize that to create the new record within that zone_id which the cloudflare_record resource expects.
resource cloudflare_record terraform_nickhammond {
  zone_id = data.cloudflare_zones.nickhammond.zones[0].id
  name    = "terraform"
  value   = data.digitalocean_droplet.terraform_demo.ipv4_address
  type    = "A"
  ttl     = 60
}
We’re utilizing two data sources here to manage this new record within Cloudflare. Since cloudflare_zones returns a list of records we’re just grabbing the first one and then that zone’s ID. Now that we have a resource in place we can see what Terraform plans to do, hehe.
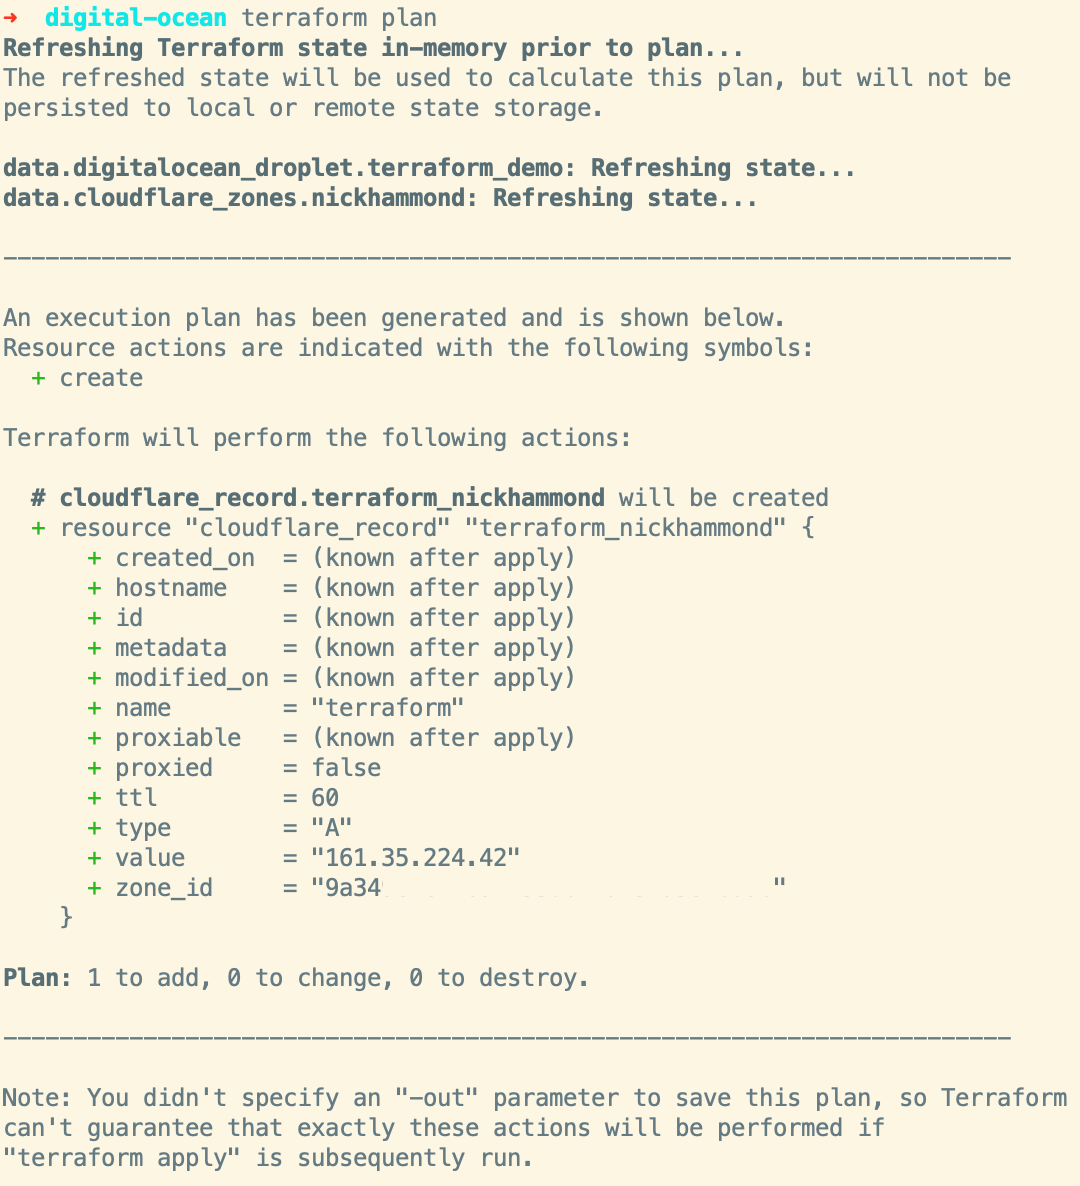
Rad, it wants to create the new A record pointing at our Digital Ocean droplet as expected. Terraform plan/apply will always give you a breakdown of what it wants to add, change, and destroy. Depending on the change that needs to be made to a resource it might force deleting that resource which in some cases is fine but something to keep an eye out for and be careful with. Terraform also allows you to control some of the resource management lifecycle so you can add in controls like preventing deletion of a resource or ignoring changes based on a specific attribute(good for auto-scaling).
We can go ahead and run apply and confirm the apply to create the record within Cloudflare.
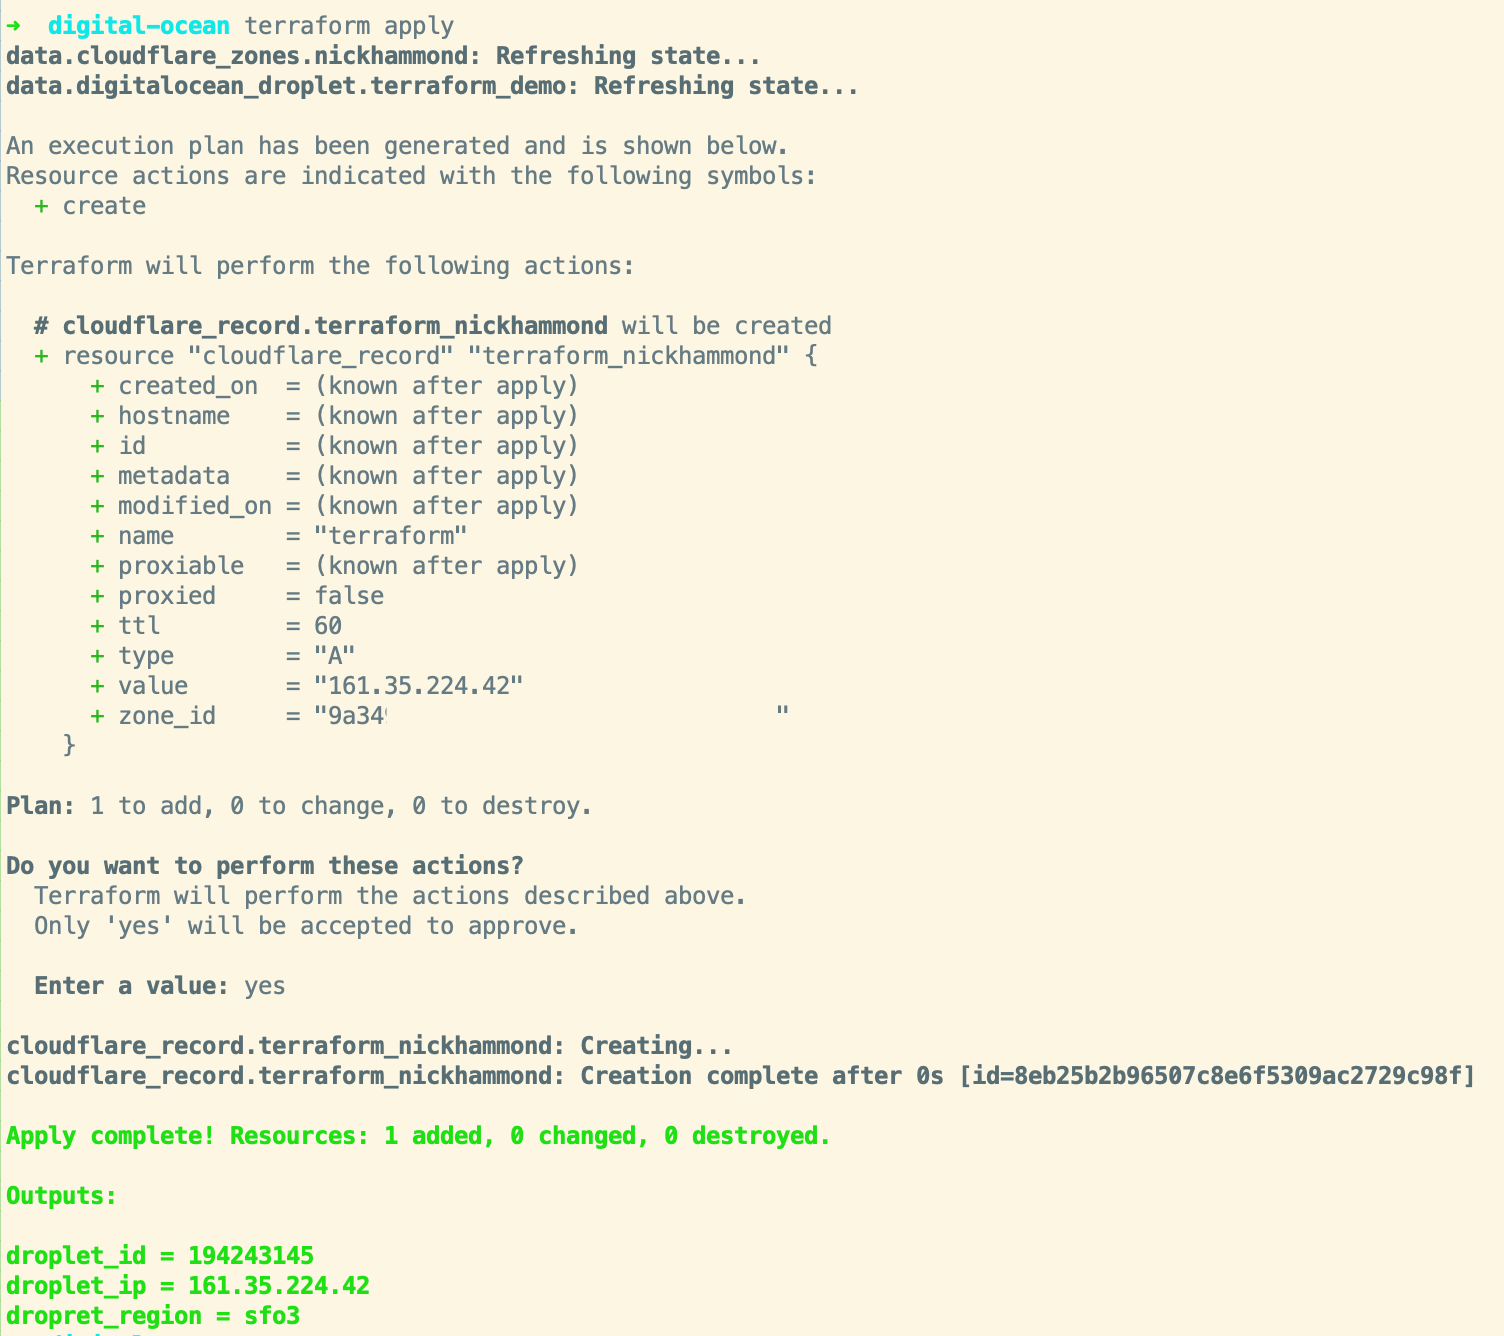
Now we can go ahead and confirm the details of the record within Cloudflare:

Looks good! If we run terraform apply again Terraform will let us know that everything looks as expected with nothing to change. Terraform can also be a way to help manage when resources drift a bit. For example, say someone changed the TTL for our record to 3600 seconds instead of 60. When we run terraform apply again it’ll show us that it wants to change the TTL back to 60 seconds with a ~.
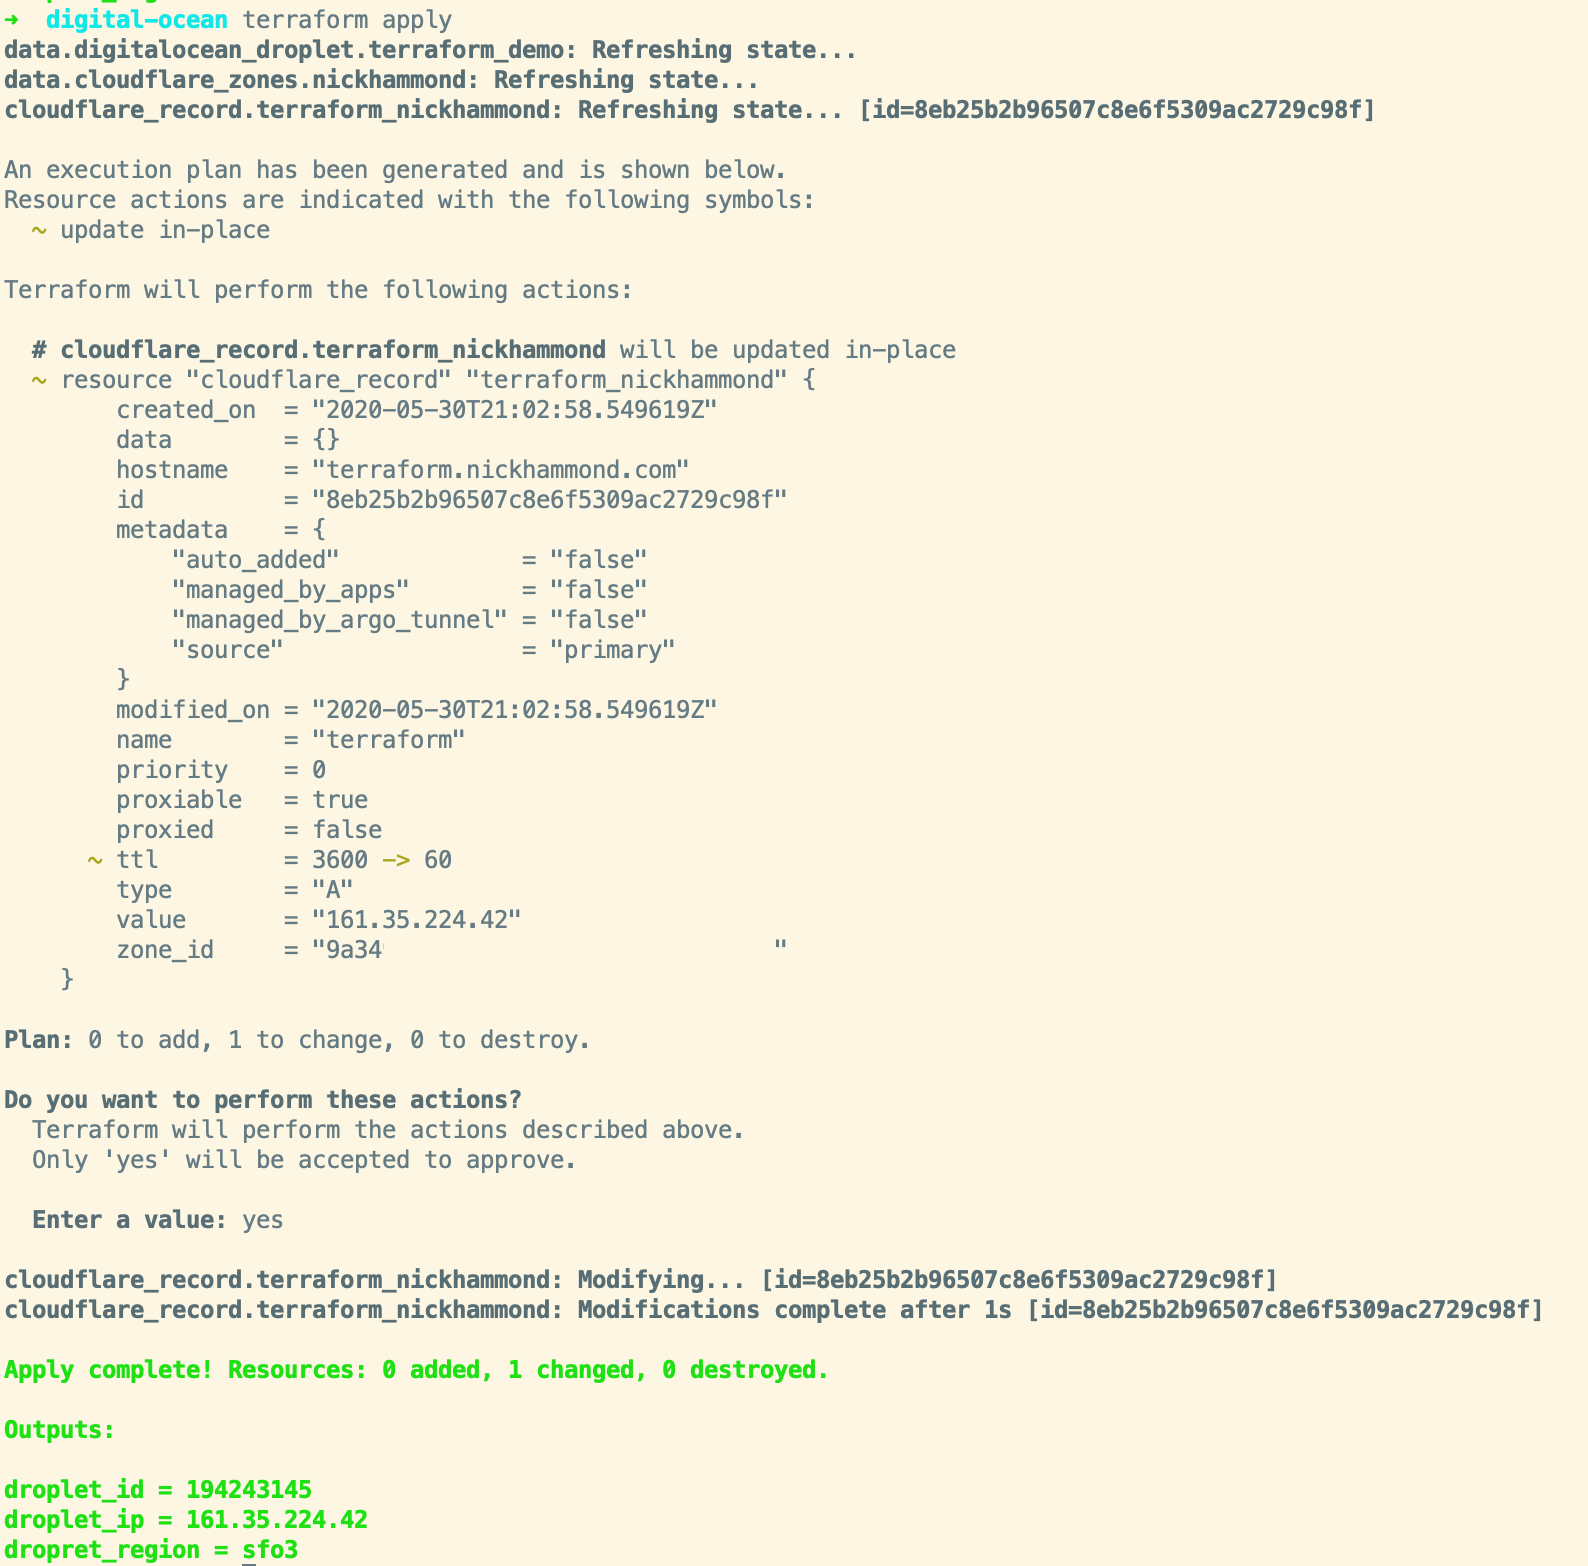
Here’s the full plan file(main.tf) after that run.
provider digitalocean {
  token   = "secret"
  version = "~> 1.18"
}

data digitalocean_droplet terraform_demo {
  name = "terraform-demo"
}

output dropret_region {
  value = data.digitalocean_droplet.terraform_demo.region
}

output droplet_id {
  value = data.digitalocean_droplet.terraform_demo.id
}

output droplet_ip {
  value = data.digitalocean_droplet.terraform_demo.ipv4_address
}

provider cloudflare {
  email   = "email@example.com"
  api_key = "secret"
  version = "~> 2.0"
}

data cloudflare_zones nickhammond {
  filter {
    name = "nickhammond.com"
  }
}

resource cloudflare_record terraform_nickhammond {
  zone_id = data.cloudflare_zones.nickhammond.zones[0].id
  name    = "terraform"
  value   = data.digitalocean_droplet.terraform_demo.ipv4_address
  type    = "A"
  ttl     = 60
}
Now that we have the Digital Ocean droplet connected to a Cloudflare record I want to be able to tag that droplet with some meta-information. Since our plan currently just looks up our droplet information we have to import the droplet resource in order to manage it. This will also change our digitalocean_droplet data source to a resource.
To switch something from a data source to a resource it takes a few steps and you want to be careful to ensure it doesn’t want to destroy or create a new identical resource.
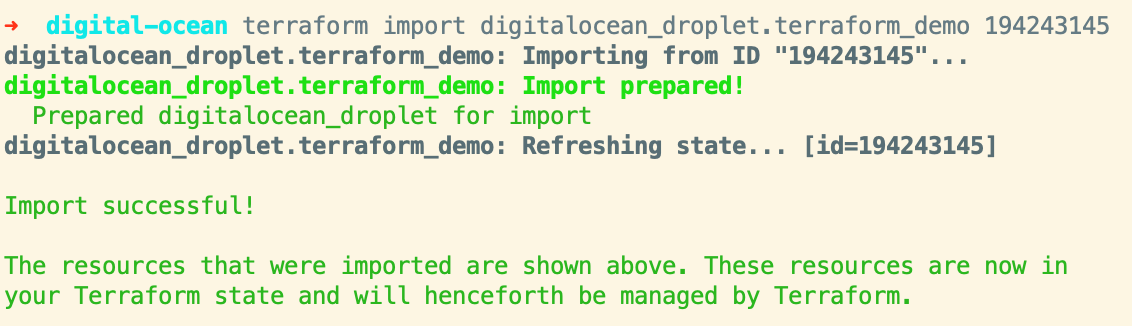
The first thing to do is to go ahead and import the droplet with the terraform import command and the droplet ID.
terraform import digitalocean_droplet.terraform_demo droplet-id-from-url

Terraform is going to complain that we need to add a resource to manage the droplet, we can go ahead and switch our data source over to a resource. When importing a resource you’ll want to set the attributes one at a time until you get to a state that Terraform doesn’t want to update anything.
If we run terraform plan again we’ll see a bunch of issues. The simplest ones to fix are changing all of our data.digitalocean_droplet.terraform_demo references to point to the new resource instead, we just need to remove the data. prefix to do that. The droplet_ip output for instance changes to:
output droplet_ip {
  value = digitalocean_droplet.terraform_demo.ipv4_address
}
Once all of those have been swapped out including the data source reference within the cloudflare_record resource we can continue adding attributes to the droplet resource to get it to a stable state. It looks like we need at least a name, image, size, and region according to the resource documentation and the output from our attempted plan run.

From our previous output values, we know that the region is sfo3 so we just need the size and image name to start with. We could go to the Digital Ocean documentation/dashboard to figure out what value we want for the image and what size the droplet is, or we can just figure it out from the Terraform plan. Go ahead and just put bogus information in there and then we’ll have Terraform highlight what the current values are so that we can ultimately set them to that instead.
resource digitalocean_droplet terraform_demo {
  name    = "terraform-demo"
  region  = "sfo3"
  image   = "ubuntu-something-or-other"
  size    = "gigantic"
}
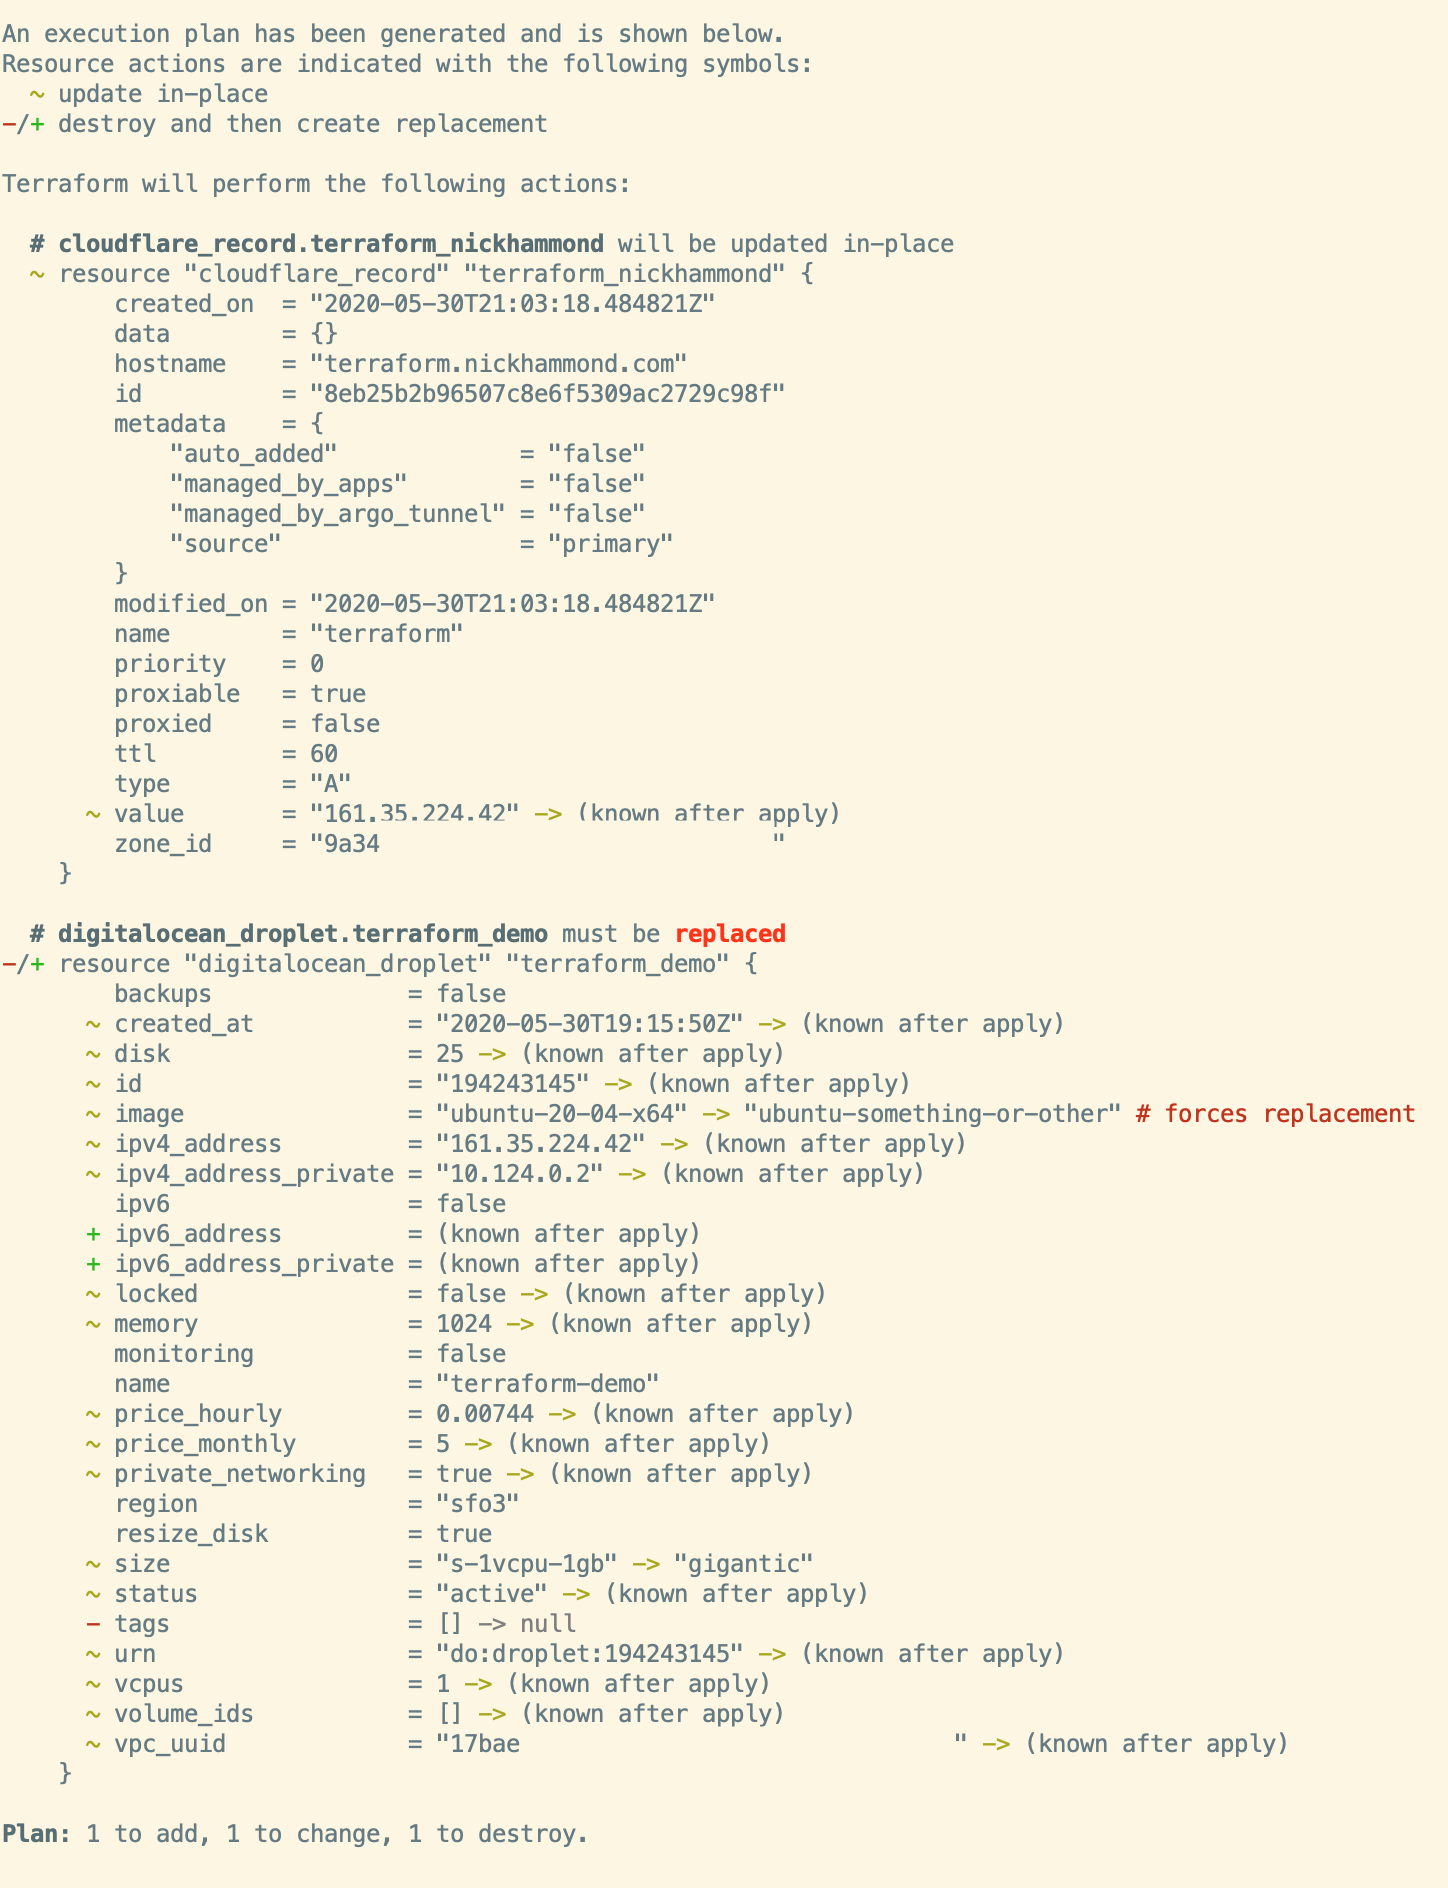
Here you can see some the Terraform lifecycle management working, Terraform thinks we’re trying to change the image which would be a forced replacement for that resource. When you see “forces replacement” Terraform is going to destroy and then create the resource with the updated attributes, we don’t want that. We can eventually put in a lifecycle block to prevent the destruction of our droplet but for now we’ll want to update the basic attributes mentioned. Go ahead and update the required attributes to the values within the Terraform plan, for my droplet that looks like this, you can see the changes in the plan above.
resource digitalocean_droplet terraform_demo {
  name    = "terraform-demo"
  region  = "sfo3"
  image   = "ubuntu-20-04-x64"
  size    = "s-1vcpu-1gb"
}
With those updated we can run terraform plan again and Terraform will now say it’s up to date and no changes are needed, yay! With that resource properly imported and configured we can go ahead and add our tags. For a little bit of sanity, we might as well also add in our lifecycle block too.
resource digitalocean_droplet terraform_demo {
  name    = "terraform-demo"
  region  = "sfo3"
  image   = "ubuntu-20-04-x64"
  size    = "s-1vcpu-1gb"
  tags = [
    "terraform_managed",
    "dns_cloudflare"
  ]

  lifecycle {
    prevent_destroy = true
  }
}
Running terraform apply we should now see that it’s going to update our tags for us and that’s the only change it’ll be making.
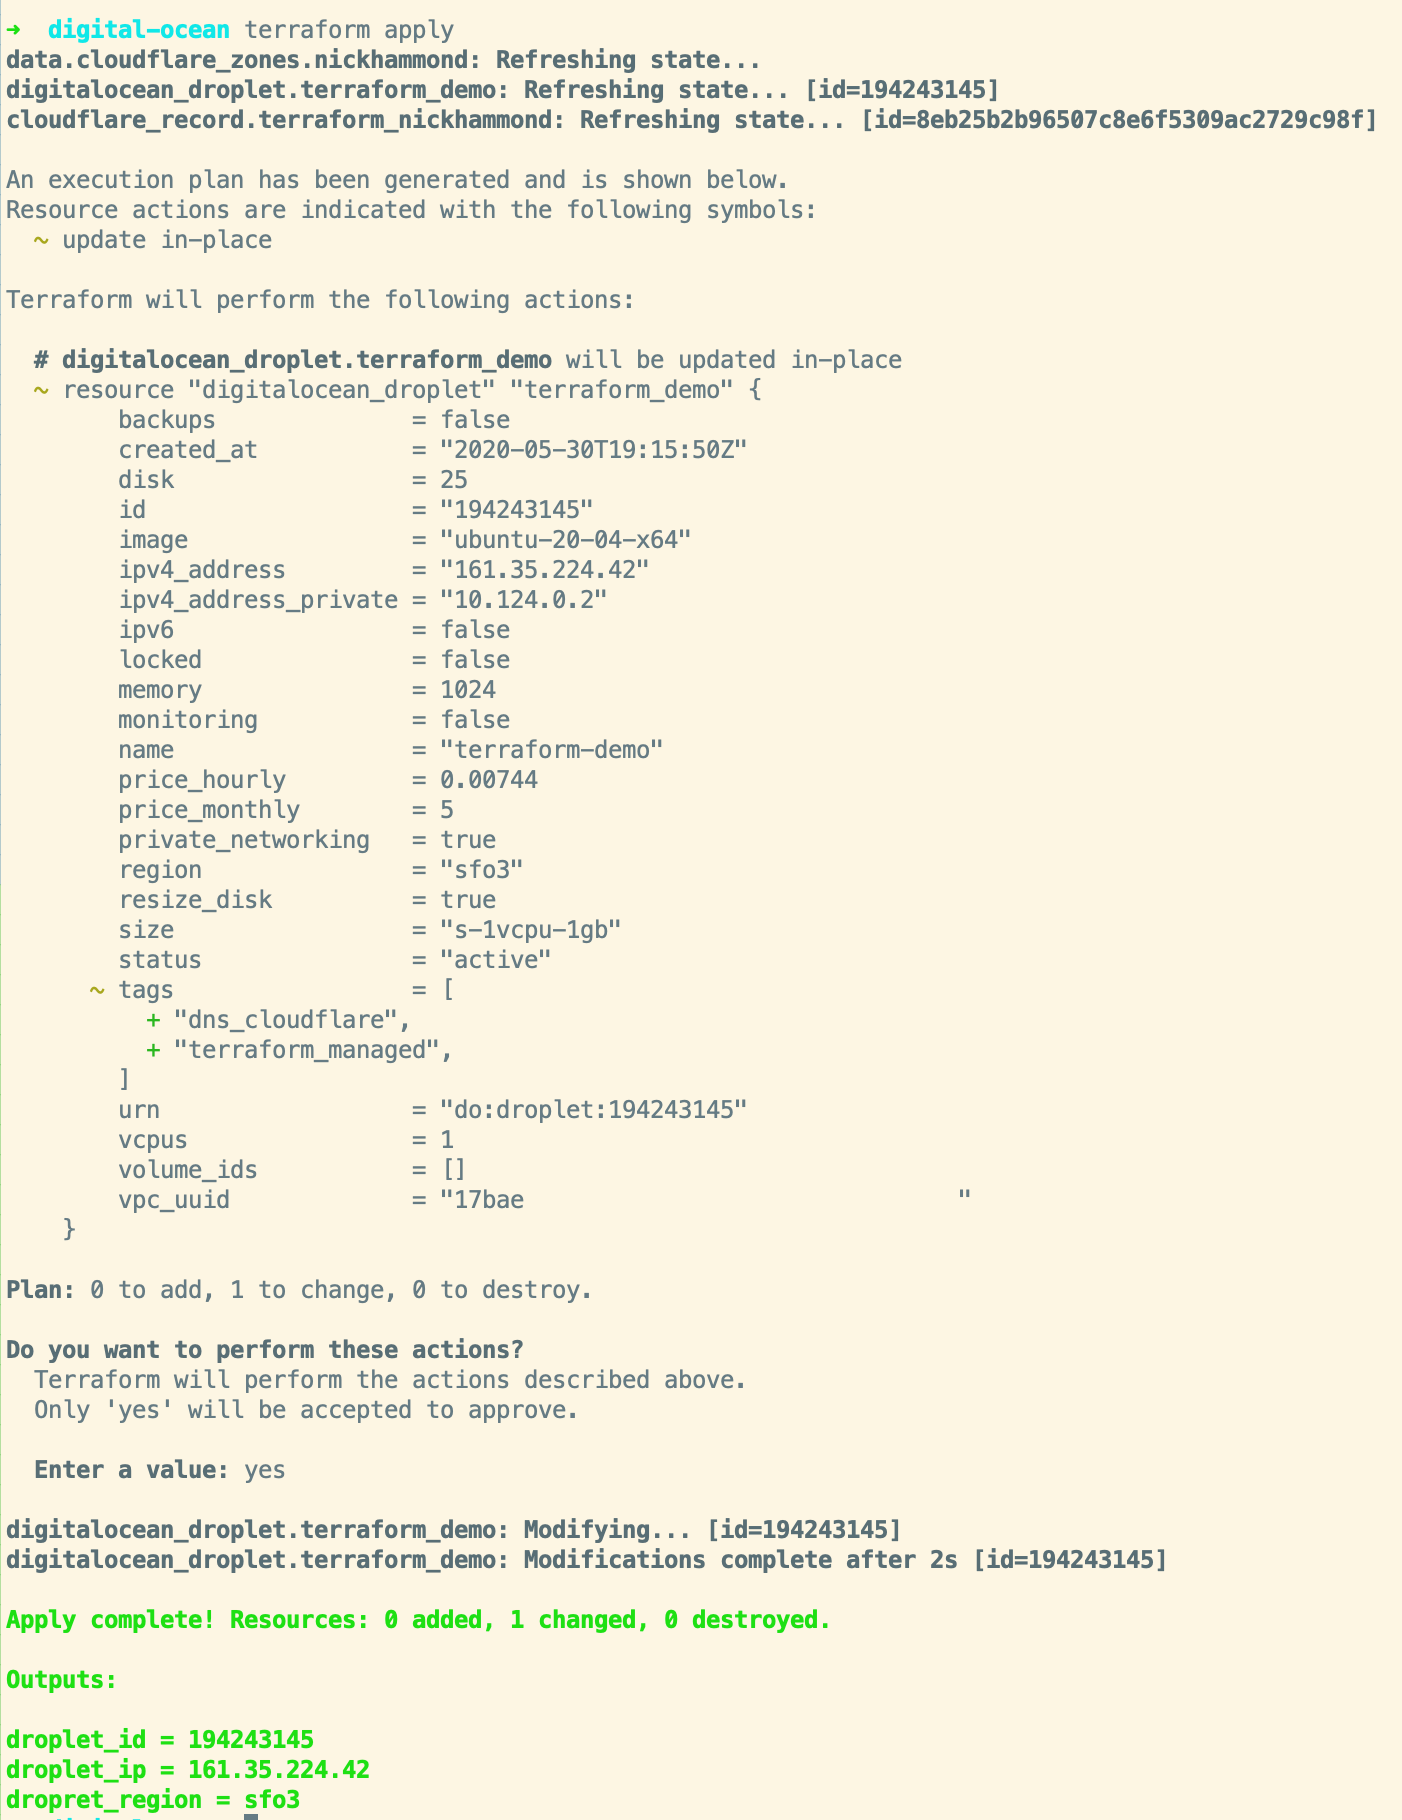
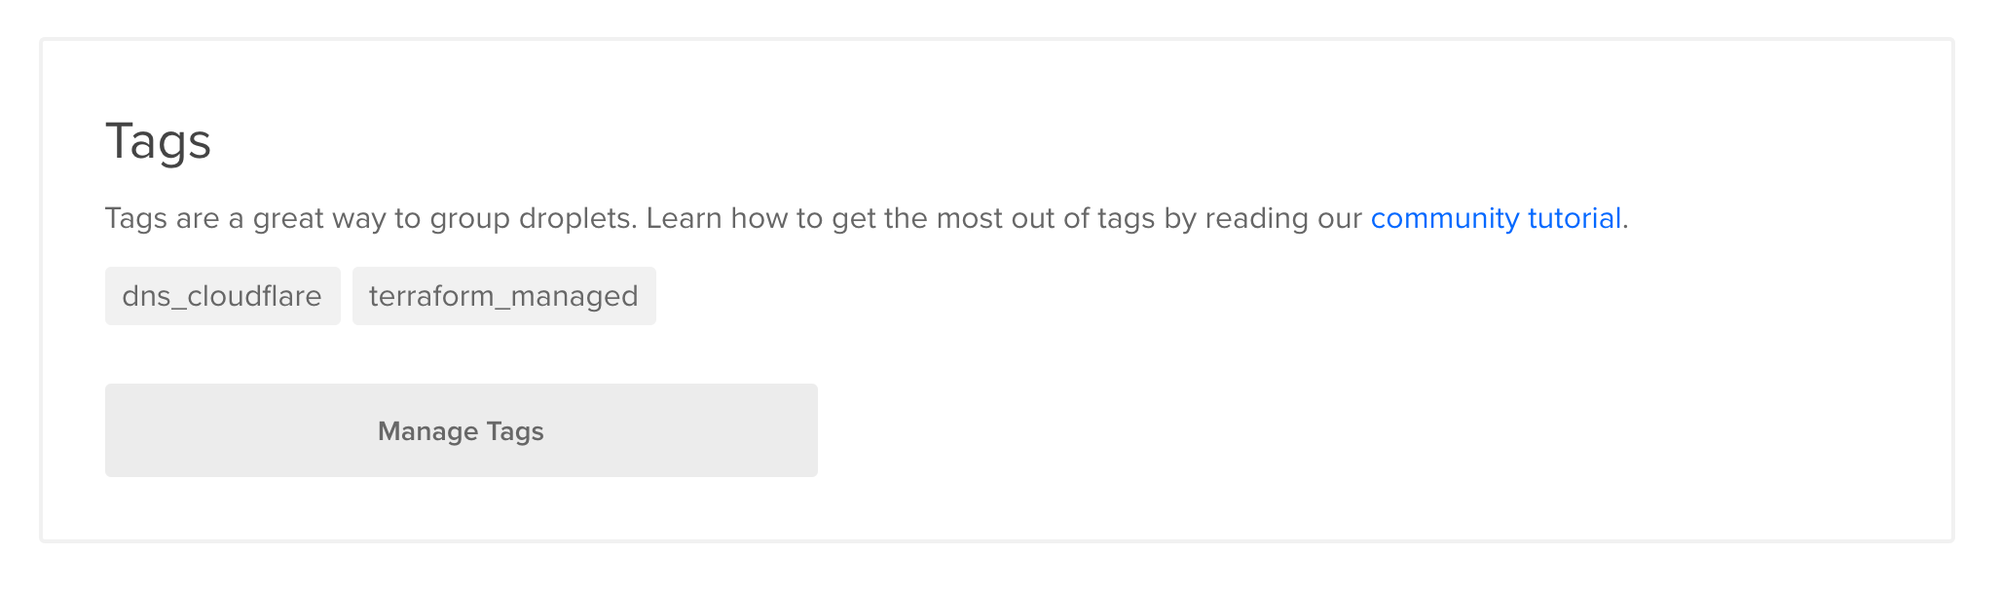
Yay! Now our droplet has the tags we’ve added and we could keep on doing this and easily see all of our droplets that are now managed via Terraform or which ones we manage DNS through Cloudflare.
Terraform will eventually make this import process even simpler, for now, if you have a lot of resources that you’re looking to import check out Terraformer. If you want to see this same process via Terraformer let me know!